Are you ready to unleash your inner artist and create vibrant, one-of-a-kind designs on your clothes? Well, get ready to tie dye like a pro with the help of tie dye spray! This exciting technique allows you to achieve stunning results in no time.
In this article, we will guide you through the step-by-step process of using tie dye spray to transform ordinary fabrics into works of art.
Before diving into the colorful world of tie dye, it’s important to prepare your materials and workspace. We’ll show you how to gather everything you need and set up an area that is perfect for unleashing your creativity.
Once you’re all set up, it’s time to choose your fabric and design. Whether you want a bold and vibrant pattern or a subtle gradient effect, we’ve got you covered.
Now comes the fun part – applying the tie dye spray! We’ll walk you through each technique and provide tips for achieving different effects.
After applying the colors, it’s crucial to let the fabric set so that the dyes can fully penetrate and bond with the fibers.
Finally, we’ll show you how to rinse your tie dyed items properly without losing any color intensity.
To ensure that your beautiful creations last for years to come, we’ll also share some essential care tips for maintaining your tie dyed items.
So get ready to dive into this colorful adventure – let’s turn those plain old garments into true masterpieces together!
Prepare Your Materials and Workspace
To begin, gather all of your materials and set up a designated workspace for your tie dye spray project. Make sure you’ve got everything you need before you start so you don’t have to constantly stop and search for supplies.
You’ll need a white cotton shirt or fabric, tie dye spray bottles in various colors, rubber bands, plastic gloves, newspaper or plastic tablecloth to protect your work area, and water for rinsing.
Before starting the project, it’s important to clean your workspace thoroughly. Wipe down any surfaces with a mild detergent or cleaning spray to remove any dirt or dust that could interfere with the dye application process. This will ensure that your colors turn out vibrant and true to their intended shade.
Once your workspace is clean and ready, explore different tie dye techniques to create unique patterns on your fabric. Some popular techniques include spiral, crumple, bullseye, and sunburst. Each technique requires various folding or twisting methods before applying the spray. Experiment with different folding methods to create one-of-a-kind designs that reflect your personal style.
Remember to wear plastic gloves throughout the entire process to protect your hands from staining. Lay out newspaper or a plastic tablecloth under your fabric to catch any drips or spills as you apply the dye.
Now that you know how to prepare your materials and workspace for a tie dye spray project, get ready for some colorful fun!
Choose Your Fabric and Design
First, select the fabric of your choice and get creative with an array of unique designs to bring your tie dye masterpiece to life.
Did you know that 80% of tie dye enthusiasts prefer using cotton fabric for its absorbent properties? Cotton is perfect for soaking up the vibrant colors of the tie dye spray, resulting in a bold and beautiful finished product. However, don’t be afraid to experiment with different fabrics like rayon or silk if you’re looking for a more luxurious feel.
When it comes to choosing a design, the possibilities are endless. You can go for classic patterns like spirals or stripes, or let your imagination run wild and create something completely original. Look for inspiration everywhere – from nature’s vibrant hues to geometric shapes found in modern art.
You can also try incorporating different techniques such as folding, twisting, or scrunching the fabric before applying the spray to achieve unique textures and patterns.
Remember that tie dye is all about self-expression and individuality. So don’t be afraid to take risks and step outside your comfort zone when choosing your fabric and design. Let your creativity shine through every brushstroke of color as you embark on this exciting tie dye adventure!
Apply the Tie Dye Spray
Now it’s time to unleash your inner artist and bring your tie dye creation to life with a burst of vibrant colors! Applying the tie dye spray is where the magic happens.
There are different tie dye spray techniques you can use to achieve various effects on your fabric. Let’s explore them!
The first technique is the classic spiral. Lay your fabric flat and pinch the center, then twist it into a spiral shape. Secure it with rubber bands, making sure they’re tight enough to prevent any leakage. Now, grab your tie dye spray bottle and start spraying from the center outwards, covering all areas of the fabric.
Another technique is called the bullseye. Similar to the spiral, pinch the fabric in the center and secure it with rubber bands. However, this time you want to create concentric circles by adding more rubber bands around the fabric at equal intervals. Spray each section with a different color for a stunning effect.
Troubleshooting tie dye spray issues is also important. If you notice that the colors aren’t blending well or appear faded, try moistening your fabric before applying the spray. This’ll help absorb more color and create a brighter result.
Remember to wear gloves when applying tie dye spray to avoid staining your hands. And don’t be afraid to experiment with different techniques and color combinations until you achieve your desired look! Happy tie dying!
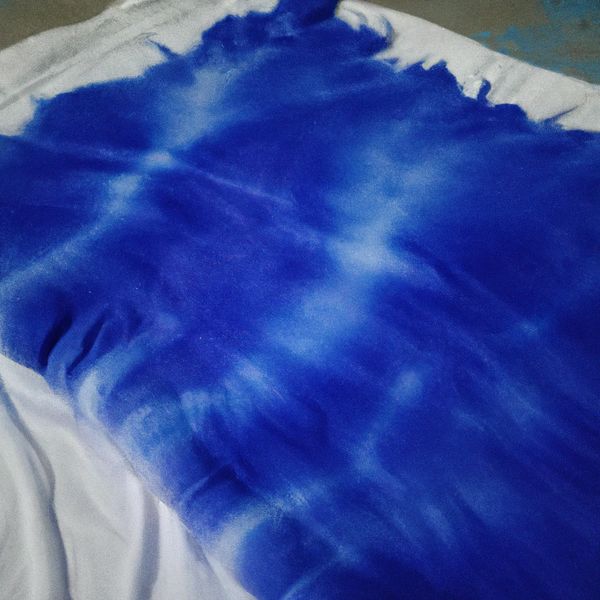
Let the Fabric Set and Rinse
After you’ve applied the tie dye spray and unleashed your inner artist, it’s time to let the fabric set and rinse it for vibrant results.
Once you’ve finished applying the spray, carefully lay your masterpiece flat on a clean surface. Make sure to avoid any wrinkles or folds that could disrupt the design. Now comes the waiting game – let the fabric dry completely before moving on to the next step.
While waiting for the fabric to dry, take a moment to remove any excess dye that may be lingering on the surface. Gently blot the fabric with a clean cloth or paper towel to absorb any dye that hasn’t fully soaked in. This’ll help prevent smudging and keep your colors crisp and defined.
Once your fabric is dry and excess dye has been removed, it’s time to rinse out any remaining residue. Fill a sink or basin with cool water and gently submerge your tie-dyed creation. Use your hands to swish it around, allowing the water to penetrate every fiber of the fabric. Continue rinsing until the water runs clear, indicating that all excess dye has been washed away.
Now that you’ve completed this final step, hang up your tie-dye masterpiece to air dry completely. Avoid direct sunlight as this can cause fading or uneven color distribution. When fully dried, give it one last inspection – marvel at your vibrant creation!
Care for Your Tie Dyed Items
To keep your tie-dyed items looking vibrant and fresh, it’s essential to properly care for them. Here are some care tips that will help you maintain the brilliance of your tie-dye creations:
- Wash with care: When washing your tie-dyed items, turn them inside out to prevent excessive rubbing against other clothes. Use a gentle cycle and cold water to avoid fading or bleeding of colors. Consider using a color-safe detergent specifically designed for dyed fabrics.
- Air dry in shade: After washing, skip the dryer and opt for air drying instead. Hang your tie-dyed pieces in a shaded area away from direct sunlight to prevent colors from fading prematurely.
- Avoid harsh chemicals: Keep in mind that certain chemicals can be damaging to tie-dye patterns. Steer clear of bleach or strong cleaning agents that may strip away the vibrant hues you worked so hard to achieve.
- Store properly: When not wearing your tie-dyed items, store them in a cool, dark place like a drawer or closet to protect them from exposure to sunlight or fluorescent lighting, which can cause fading over time.
By following these simple care tips and preventing fading through proper maintenance, you’ll ensure that your tie-dyed items continue to bring joy and inspiration for years to come. So go ahead and embrace the colorful world of tie dye!
Frequently Asked Questions
Can I use tie dye spray on synthetic fabrics?
Sure! With tie dye spray, you can easily add a splash of color to your synthetic fabrics. Unlike traditional tie dye methods, it’s quick and mess-free. Follow these tips for vibrant colors: pre-wash the fabric, use plenty of spray, and let it sit for at least 8 hours before rinsing.
How long should I let the tie dye spray set before rinsing?
Let the tie dye spray set for at least 6-8 hours before rinsing to achieve vibrant and long-lasting colors. This allows the dye to fully penetrate the fabric. Experiment with different techniques like folding, crumpling, or tying for unique patterns.
Can I mix different colors of tie dye spray together to create new shades?
Mixing different colors of tie dye spray together allows you to create new shades and experiment with creating ombre effects. By combining colors and using different spray techniques, you can achieve unique and personalized designs that will make you stand out in a crowd.
Will tie dye spray stain my hands or skin?
Tie dye spray may stain your hands or skin, but it’s temporary and will fade over time. To stay safe, wear gloves and protect your clothes. Enjoy the creative process and embrace the vibrant colors!
Can I use tie dye spray on already dyed or printed fabrics?
Yes, you can use tie dye spray on already dyed or printed fabrics. However, it is important to be cautious when applying it to delicate fabrics. You can also experiment with different application techniques for unique and vibrant results.
Conclusion
Congratulations on successfully tie-dyeing your fabric using spray! You’ve transformed a plain piece of cloth into a vibrant work of art.
As you let the colors set and rinse away the excess dye, you can’t help but feel a sense of anticipation and excitement. Each time you wear or use your tie-dyed items, they’ll serve as a reminder of your creativity and the fun-filled process it took to make them.
So go ahead, show off your unique style and enjoy the compliments that are sure to come your way!