Tie dye is a fun and creative way to express your style. But can you tie dye a black shirt? The answer is yes! In this article, we’ll show you how to tie dye a black shirt so that you can create beautiful and unique designs. So let’s get started!
Tie Dye a Black Shirt: What You’ll Need
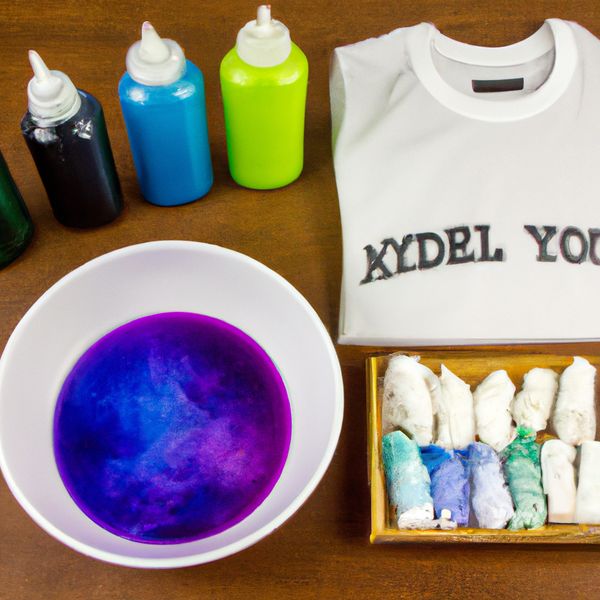
If you’re looking to tie dye a black shirt, here’s what you’ll need:
- Bleaching agent – this will be used to remove some of the color from the fabric to make the tie-dye design visible.
- Tie-dye kit or dye – You can use a premade tie-dye kit, or choose any color or colors of your own (we recommend using liquid fabric dye for best results).
- Rubber bands – these are used to help create patterns and designs on your shirt.
- Salt – this helps set the color and protect it from fading.
- Plastic bag or cover – This will help keep your work area clean and prevent any spills.
With these supplies in hand, you’re ready to start creating a unique and colorful tie-dye design on your black shirt!
Tie Dye a Black Shirt: Preparing the Shirt
Preparing the shirt for tie-dyeing is an important step in the process. Before you start, you need to make sure the shirt is clean and free of dirt or oil.
You can machine wash it with a mild detergent, or hand wash it in a sink with some laundry soap. Once the shirt is clean, rinse out all the soap and let it air dry – do not put it in the dryer!
Once your shirt is completely dry and ready to go, prepare your work area by laying down some plastic bag or cover .
This will help protect your surfaces from any spills or other messes. Put on some gloves to protect your hands from any dyes or bleach, and make sure you have all of your supplies ready – dye powder, rubber bands, gloves, etc.
Now that everything is set up and ready to go, you can begin preparing your shirt for tie-dyeing! Start by turning the shirt inside out so that any dye won’t bleed onto other parts of the fabric. Then decide on what pattern or design you want to create.
You can use rubber bands to section off certain parts of the fabric for dying different colors – just be careful not to pull too tightly as this can cause damage to the fabric!
Finally, soak your shirt in water for about 10 minutes before adding any dyes or bleach – this will help ensure better color saturation when dying. And once everything is prepped and ready to go, it’s time to start tie-dyeing!
Choosing Your Colors
Choosing the right colors for your tie-dye project can be both exciting and overwhelming. Whether you’re creating a bold statement piece or a subtle design, it’s important to select colors that work together.
Here are a few tips to help you choose the perfect combination of colors for your next tie-dye project.
Start with the basics: Primary colors offer more control over the final dye colors, so it’s best to start with them. The three primary colors of tie dye are fuchsia, turquoise, and lemon yellow. Mixing these three together will give you a range of secondary hues like pink, green and orange.
Choose complementary colors: Complementary color combinations can make your project really stand out. Think warm and cool tones—like red and green or blue and orange—to create an eye-catching design.
Experiment with shades: If you want something more subtle than complementary colors, try experimenting with varying shades of one hue or multiple hues that all belongs in the same family (like blues).
This technique will give your design added depth while still looking cohesive overall.
Think about color intensity: When selecting different shades for your tie-dye project, opt for high-quality dyes that create vibrant results. The brighter the better!
Keep an open mind: Your color choices don’t have to be limited to the usual suspects! If black is part of your wardrobe then yes – you can still tie-dye it! All you need is a bleaching agent first before applying different dyes on top of it for some unique results!
Applying the Dye
Applying the dye to a black shirt is a great way to give it a unique and colorful look. The process of tie-dyeing involves using fabric dyes and tying up parts of the shirt to form a pattern or design.
While this process is usually done on light colored fabrics, it can also be used on dark fabrics like black. Here are some tips for how to tie-dye a black shirt:
1) Prepare the Shirt: Start by washing the shirt with detergent and hot water. This will help remove any dirt or debris from the fabric before you start applying dye.
2) Apply Dye: Choose your dye colors and mix them according to package directions. Dip your shirt in one color at a time, making sure to completely submerge it in each color until you get the desired effect. Allow each application of dye to sit for 15 minutes before moving onto the next color.
3) Set Dye: After all colors have been applied, place your shirt in a plastic bag and let it sit overnight so that all the dye has time to set into the fabric. Once this is complete, take out your shirt and rinse out any excess dye with cold water until clear water runs off.
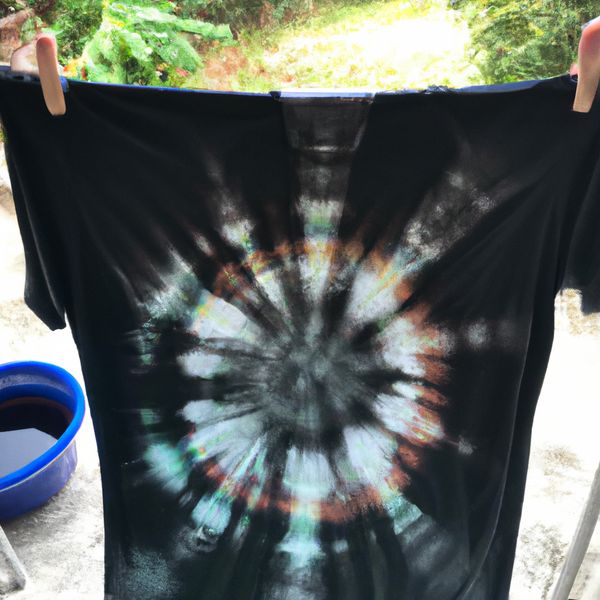
4) Dry Shirt: Hang your tie-dyed black shirt outside or lay flat on an old towel until all moisture has evaporated from the fabric before wearing or displaying proudly!
Creating Different Patterns
First, choose your fabric – you can use cotton, linen or any other natural fibers. Make sure the fabric is washed and clean before beginning. Pick out a few colors of dye that you want to use – food coloring or fabric dye work best.
Next, decide what kind of pattern you would like to create. Folding the fabric in various ways will give you different patterns – try making spirals, stripes, bullseyes or crumpled designs for different effects.
Secure the folds with rubber bands or thread so they stay in place while dying.
Submerge your fabric in the dye mixture for 20 minutes and then rinse it off once it’s finished absorbing the color. Remove all ties and unfold your masterpiece! Let it air dry before wearing or displaying it proudly!
Adding Layers of Color
Adding layers of color to clothing can be a fun and creative way to express yourself. By using different colors, you can create unique designs and patterns. Tie-dye is one of the most popular methods for adding color layers, but there are other ways as well.
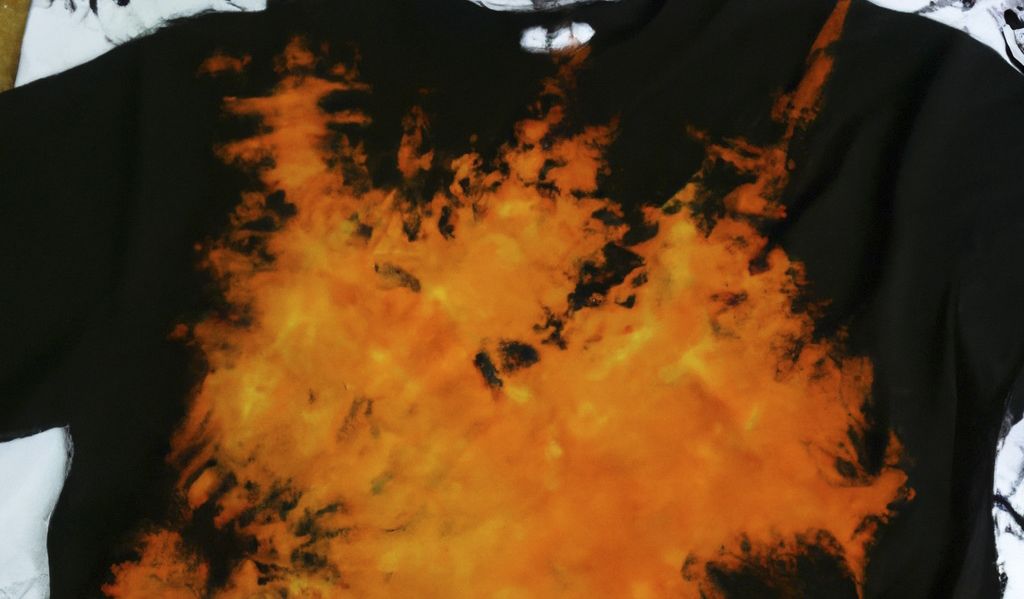
Bleach tie-dye is a great way to upcycle black or dark-colored shirts into something totally new and exciting. Start by tying the garment with rubber bands or string in the areas you want to stay darker.
Then, use a bleach soak or spray bottle with diluted bleach and spritz it over the shirt in the areas you want lighter colors. Finally, rinse it out in cold water and let it dry completely before wearing!
Using fiber reactive dyes is another great way to add layers of color to clothing that won’t fade in the wash. These dyes are specifically formulated for fabrics like cotton, rayon, linen, silk, wool, and nylon so they will last longer than all-purpose dyes.
Follow the instructions on the packaging for how much dye powder to mix with water for each fabric type before submerging your garment into the dye bath. After soaking for an hour or two, rinse out your clothing in cold water until it runs clear then hang up to dry!
No matter what method you choose for adding layers of color to your clothes, have fun experimenting with different techniques and colors!
Letting it Sit and Soak Up the Color
Tie-dyeing is a fun and creative process that allows you to create unique patterns and designs on fabric. The key to successful tie-dyeing is to let the fabric sit and soak up the color for an extended period of time.
The first step in tie-dyeing is to prepare the fabric by soaking it in warm water. This allows the dye to adhere better to the fibers of the fabric. After soaking, wring out any excess water and then apply your desired dyes or design.
Once you’ve created your design, it’s important to let it sit for a minimum of 8 hours, but ideally overnight or longer if possible. During this time, keep your dyed items wet and in a warm place; this will help ensure that all areas of the design have been exposed properly to the dye.
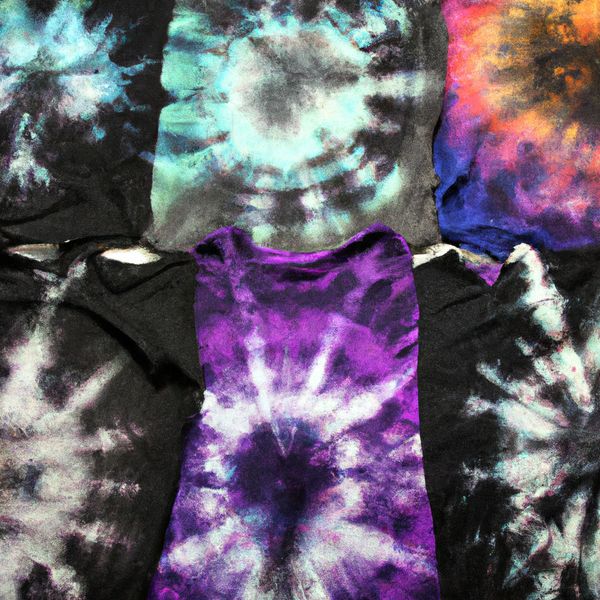
For darker fabrics such as black, using transparent dyes can be effective for creating different colors and designs; however, bleaching tie-dye methods are also good options for upcycling black clothing items.
Additionally, when working with colored fabrics, longer setting times can result in brighter colors after washing and drying them out.
Once you’ve allowed enough time for your tie-dye project to set properly, rinse it out with cold water until all excess dye has been removed from the fabric before washing it as usual with laundry detergent. And voilà! You now have a one-of-a-kind piece that you can proudly show off!
Rinsing Out the Excess Dye
Rinsing out excess dye from a tie-dyed item is essential to ensure your vibrant colors remain vibrant and true.
To rinse out the excess dye, start by taking off the rubber bands and rinsing the item under cold running water until the water runs clear. Once you have finished rinsing, wash the item in a washing machine with other dark clothing or towels on a cold setting. After washing, make sure to rinse each item again separately under warm water until the water runs nearly clear.
If multiple items have been dyed in different colors, make sure to separate them before washing so that their colors do not bleed into one another. Finally, after rinsing each item completely, hang it up to dry for long-lasting color vibrancy!
Washing and Drying Your Shirt for a Perfect Finish
If you’re looking for a perfect finish to your tie-dye project, proper washing and drying of the fabric is essential. Before dyeing your shirt, ensure that it is washed and dried thoroughly.
This will help ensure that the dye binds to the fabric better and results in an even coloration. After dyeing, it is important to wash the dyed fabric in hot water with Synthrapol or another laundry detergent.
Hang the item until not dripping wet and then give it a rinse in cold or cool water before wringing out any excess moisture. For best results, use a gentle detergent formulated for cold water washes to prevent dyes from bleeding.
Finally, let the dyed item air dry completely before wearing or storing. By taking these steps towards proper washing and drying of your tie-dye projects, you can guarantee a perfect finish every time!
Tips for a Perfect Tie Dye Job Every Time!
Start with high-quality dyes. To ensure long-lasting color and vibrancy, choose dyes that are specifically formulated for tie dye fabric such as Procion MX or Fiber Reactive Dyes.
These dyes are designed to bond permanently with the fibers of the fabric, creating bright and permanent colors.
Always prewash fabrics before tie dying them. This step is essential to remove any sizing or stiffness from the fabric so that it absorbs the dye evenly and easily.
Choose an appropriate dyeing technique depending on your desired outcome – traditional spiral pattern, crumple technique, circles etc… Make sure you understand how each technique works so you get the best results possible!
If using bleach in your tie-dye project, always use a non-chlorine bleach and follow all safety instructions carefully!
Bleach should only be used on darker colored fabrics such as black or navy blue, as it will not show up on lighter materials.
When rinsing out your dyed fabric, use warm water until all the excess dye has been removed from it – this process can take anywhere from 15 minutes to several hours depending on how much dye was used in the project.
Finally, make sure to let your fabric air dry completely before washing it again (or wearing it!) so that all the colors stay vibrant and beautiful!